OBS Studio Events
Reflect the status of your OBS Studio on your DeviceJockey panels.
Make buttons light up when scenes are active, let volume controls follow and let labels show the status of your CPU or the length of a clip.
Reflect the status of your OBS Studio on your DeviceJockey panels.
Make buttons light up when scenes are active, let volume controls follow and let labels show the status of your CPU or the length of a clip.
The DeviceJokey receives two different types of events from OBS Studio.
OBS Events and OBS Request Responses.
Sent when states change in OBS Studio.
This can be, for example, changing a scene or changing an audio level.
The user in OBS Studio.
DeviceJockey items that control and display the status in OBS Studio can be kept up to date with OBS Events.
{
  "d": {
    "eventData":{
      "sceneName" : "Scene1"
    },
    "eventType" : "CurrentProgramSceneChanged",
  },
  "op" : 5
}
The event type, such as “CurrentProgramSceneChanged” after changing the scene in OBS Studio.
Data that describes the event in more detail.
For example, “CurrentProgramSceneChanged” uses “sceneName” to specify the scene that is now visible in OBS Studio.
Identifies the request (used for internal purpose).
Are sent after a status request.
This can be, for example, a request about the current scene or the current level of an audio source.
The DeviceJockey user sends a command to OBS Studio to request the status.
After starting the connection to OBS Studio, DeviceJockey items that control and display the status in OBS Studio may not be up to date.
With status requests to OBS Studio, items are be brought up to date using the coresponding OBS Request Responses.
{
  "d": {
    "requestType": "GetCurrentProgramScene",
    "responseData: {
      "currentProgramSceneName": "Scene1"
    },
  "requestId" : "F718DA2E-0BA3-4271-B05D-983C0BB5709B"
  },
  "op": 7
}
The status request type.
For example “GetCurrentProgramScene” to request the current scene in OBS Studio.
Result of the status request, such as “currentProgramSceneName” as the name of the current scene in OBS Studio.
The value for the “requestId” attribute corresponds to the “requestId” of the command that was sent to OBS Studio for status request.
Identifies the request (used for internal purpose).
Add OBS Value, Range or Label events to your items in DeviceJockey, to react to OBS Studio events.

The JSON field has a key role.
It is used to filter the incoming OBS events so that only the desired event remains and the item is updated.

You can create your JSON from scratch or press the Buffer button to use the buffer.
The buffer stores the last 50 received events from OBS Studio.

Use the plus or minus button to navigate through the buffer.
Press the bin to empty the buffer.
Control OBS Studio while viewing the buffer to fill it up with new events.

Use the brush to reformat your JSON.

Use undo to restore changes you have made.

Tap the history to use JSON text you have entered before.
Press the history long to get a list off all entries in the history.

Adjust the size of the text to your liking.

Each attribute specified in the JSON must be present in the incoming OBS Event or OBS Request Response and the value must be identical.
If this is not the case, this OBS Event will not update the item.
On the other hand, attributes that only exist in the OBS Event or the OBS Request Response are ignored and do not prevent the item from being updated.
Dynamic attributes are ignored during filtering so that OBS Studio is able to update the items with different values even though the value in the JSON does not match.
Used, for example, in items like slider, rotary or toggle.
Slider uses this attribute to update their slider position.
Toggle uses it to set their on or off state.
Used in the label of items to update the text.
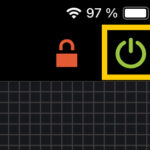
Be sure that the DeviceJockey is connected to OBS Studio.
The on/off button in the right top corner must light up in green.

Create a new button on your panel.
Then edit the button and add an “OBS Range” event to the light on/off action.

Tap the buffer button to show the buffer.
When the buffer is visible, the button lights up green and your JSON editing view appears grayed out.

Clear the buffer with a tap on the bin button.
Now select a scene in OBS Studio and look at the buffer.
It has been filled up with events from OBS.
Tap the plus and minus buttons to navigate through the buffer.
Look for the event that has an “eventType” attribute named “CurrentProgramSceneChanged”.

Deselect the buffer with a tap on the buffer button.
The JSON editing view should now be white again with the selected event shown.
The buffer button appears blue.

Fill in the “Dynamic value attribute” field with “sceneName”.

Or select “sceneName” in the JSON and select “Attribute” from the menu.
If you don’t see the menu give the selected “sceneName” a short tap.
After you select “Attribute” the “sceneName” is adopted into the “Dynamic value attribute” field.

Fill in the “Light on” field with the scene name that should light up the button.
Fill in the “Light off” field with the same scene name and prefix this name with an exclamation mark.

Now select “String” as value type.

Complete the editing using the check mark in the top right.
Your button does now light up when you select the scene in OBS.
If you select another scene, the light in the button turns off.

Create a new slider or rotary on your panel.
Then edit the button and add an “OBS Range” event to the slider/rotary action.
Tap the buffer button to show the buffer.
When the buffer is visible, the button lights up green and your JSON editing view appears grayed out.
Clear the buffer with a tap on the bin button.
Now use the volume slider in OBS Studio you want to adopt to the slider in the DeviceJockey and look at the buffer.
It has been filled up with events from OBS.
Tap the plus and minus buttons to navigate through the buffer.
Look for the event that has an “eventType” attribute named “InputVolumeChanged”.
The attribute “inputName” needs to have the name of your audio source.

Deselect the buffer with a tap on the buffer button.
The JSON editing view should now be white again with the selected event shown.
The buffer button appears blue.
Fill in the “Dynamic value attribute” field with “inputVolumeDb”.

Or select “inputVolumeDb” in the JSON and select “Attribute” from the menu.
If you don’t see the menu give the selected “inputVolumeDb” a short tap.
After you select “Attribute” the “inputVolumeDb” is adopted into the “Dynamic value attribute” field.

Fill in the “Slider top” field with 0.
Fill in the “Slider bottom” field with -100.

Now select “Float” as value type.

Complete the editing using the check mark in the top right.
Your slider/rotary does now follow your volume slider in OBS.
Make a label light up when the scene “Scene1” is active in OBS Studio.
Otherwise the label should not light up.
Send the request for the status of the label after the panel has switched to live mode and the OBS interface has been connected to OBS Studio in DeviceJockey.
OBS Studio provides the “GetCurrentProgramScene” command to request the current scene.
Create a new button and name it “Status”.

Add an “OBS Value” command to the tap action.

Select “Get current program scene” from the templates.

Change the value of the “requestId” attribute to “current.scene.request” to be able to recognize the event later.

Complete the creation of the command using the upper right checkmark and return to the panel.
Execute the status request so that the event is generated by OBS Studio and received by the DeviceJockey.
To do this, activate live mode and tap the “Status” button once.
Exit the live mode and turn back to edit mode.
Create a label and name it “Scene1”.

Create an “OBS Range” event for the light on/off action.


Activate the buffer for the JSON and use the plus and minus keys to search for the entry that contains the value “current.scene.request” as “requestId”.
When the entry is displayed, you can deactivate the buffer.

Fill in the “Dynamic value attribute” field with “currentProgramSceneName”.

Or select “currentProgramSceneName” in the JSON and select “Attribute” from the menu.
If you don’t see the menu give the selected “currentProgramSceneName” a short tap.
After you select “Attribute” the “currentProgramSceneName” is adopted into the “Dynamic value attribute” field.

Fill in the “Light on” field with “Scene1” which should light up the label.
Fill in the “Light off” field with “!Scene1”. Every other scene name should turn off the label light.

Now select “String” as value type.

Now activate live mode and select “Scene1” in OBS Studio.
Press the “Status” button.
The label should now light up.
Choose a different Scene in OBS Studio.
Press the button again.
The light in the label should turn off.
What is still missing is the “Panel ready” system event in the “Status” button.
It is intended to ensure that the request command in the button is executed after you have switched your panel to live mode and the connection to OBS Studio is established.
Go into edit mode and edit the button.
Add the event called “Panel ready” to the Tap Action.

Then display the list of tap action commands.
Select the request command to query the current scene and move it to the left.
Select RemoteOptions.

In the list, tick “System trigger”.
Complete your entry using the checkmark at the top right.


In OBS Studio you select “Scene1” as the current scene.
Now start live mode.
After live mode is started, your label lights up immediately.
Change the scene in OBS Studio and press the “Status” button once.
The light in the label turns off.
In DeviceJockey, switch to edit mode and back to live mode.
This time the light in the label stays off.
Even if you tap the “Status” button, the label remains off.