
Send requests to OBS Studio.
DeviceJockey → OBS Studio
Change scenes, control inputs, start recording, trigger hotkeys, operate media, and use other OBS WebSocket functions.
DeviceJockey
Interfaces
Control OBS Studio and keep your DeviceJockey panel synchronized with its current state.
OBS WebSocket
DeviceJockey connects to the WebSocket server built into OBS Studio. Commands send JSON requests to OBS. Events use incoming JSON to update Items or perform their actions.
Change scenes, control inputs, start recording, trigger hotkeys, operate media, and use other OBS WebSocket functions.
Events react to configured JSON by lighting an Item, moving a Slider, updating a label, protecting an Item, or performing commands.
The same connection carries outgoing requests, request responses, and events sent by OBS Studio.
A Toolbox is a ready-made DeviceJockey Scene for an interface or application. The OBS Studio Toolbox contains prepared Panels and Items that demonstrate common OBS controls and feedback. Import the Scene, try its functions, then copy useful Items into your own Scene and change them for your workflow.
Download the DJX file and import it into DeviceJockey as a Scene.
Connect the included OBS interface and try the configured Commands, Events, and feedback functions.
Copy useful Items into your own Scene. Change scene names, input names, ranges, colors, and layout as required.
Setup
Prepare the WebSocket connection.
In the OBS Studio menu, open Tools and select WebSocket Server Settings.
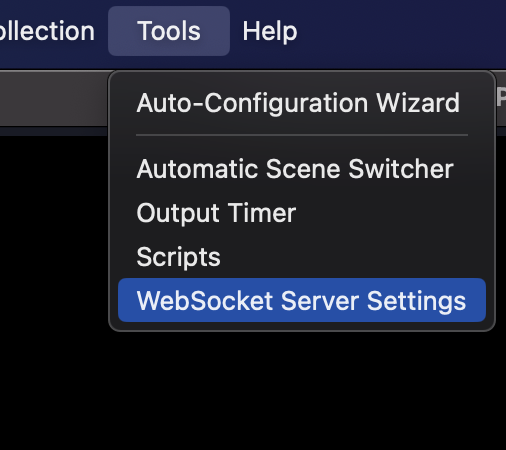
Choose WebSocket Server Settings from the Tools menu.
Enable Enable Authentication. Let OBS generate a password or enter your own password.
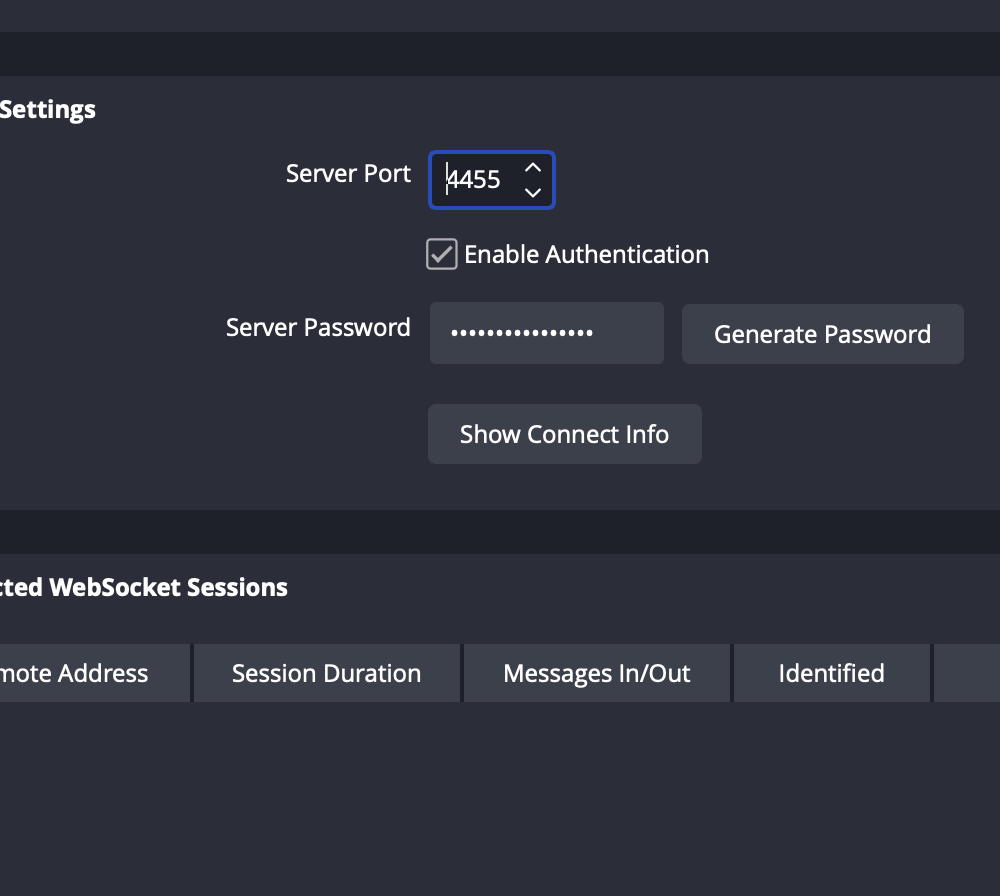
Enable authentication and generate or enter a password.
Select Show Connect Info. Leave this window open for the DeviceJockey setup.
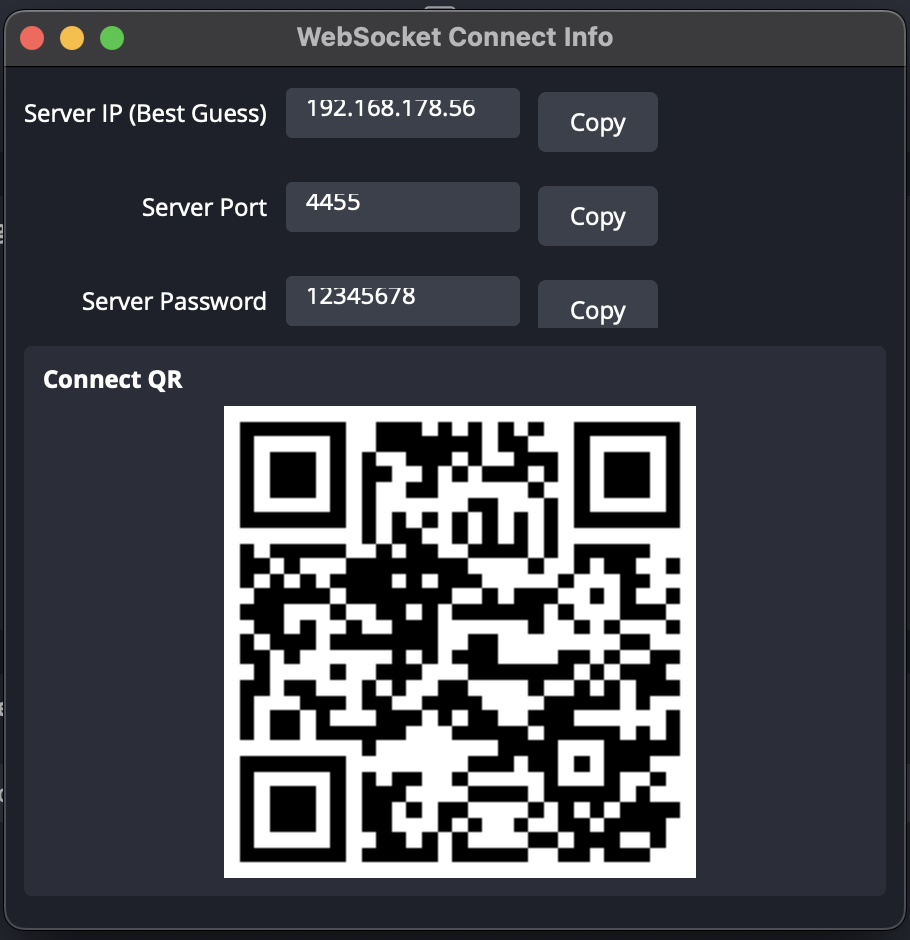
DeviceJockey will scan this connection information in the next part.
Add the interface and scan the QR code.
Open the Interfaces list in the required Scene, select +, then choose add Interface.
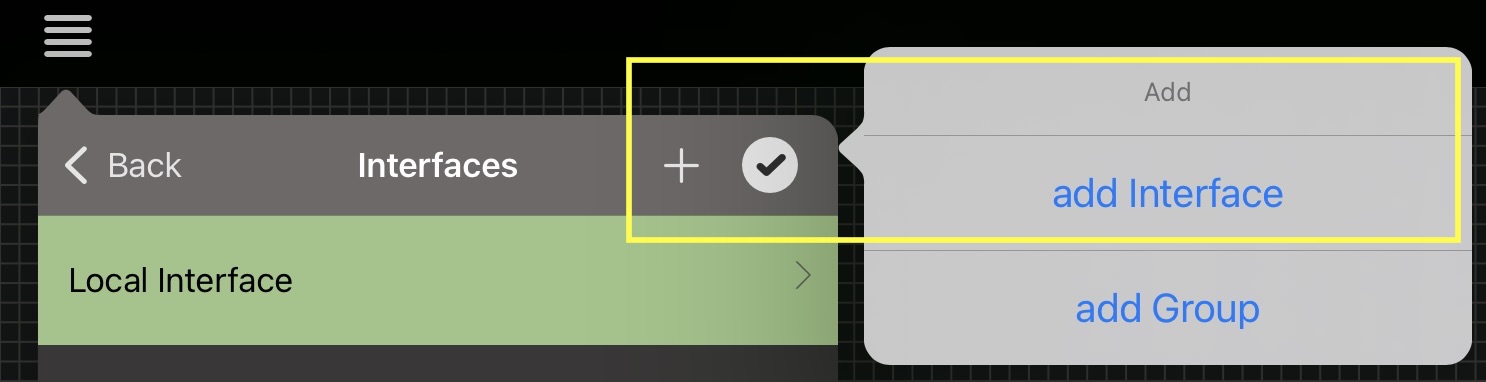
Use + in the Interfaces list and choose add Interface.
Choose OBS Studio from the list of available interfaces.
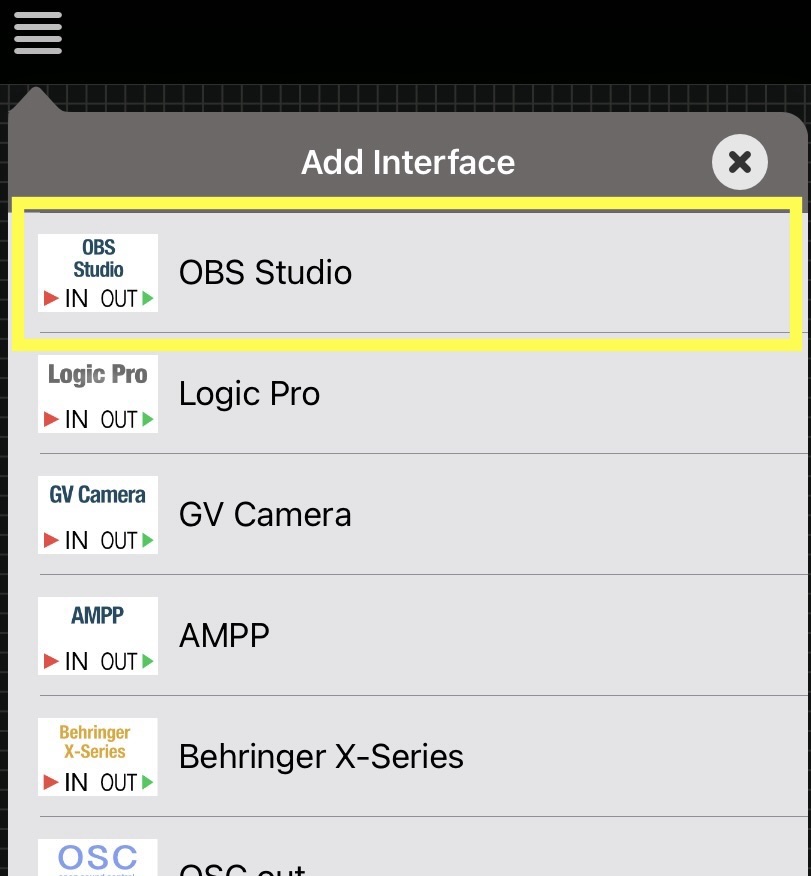
Add the OBS Studio interface to the current Scene.
Open the new interface's settings, select Scan QR Code, and scan the code shown in OBS. Confirm the settings with the check mark.
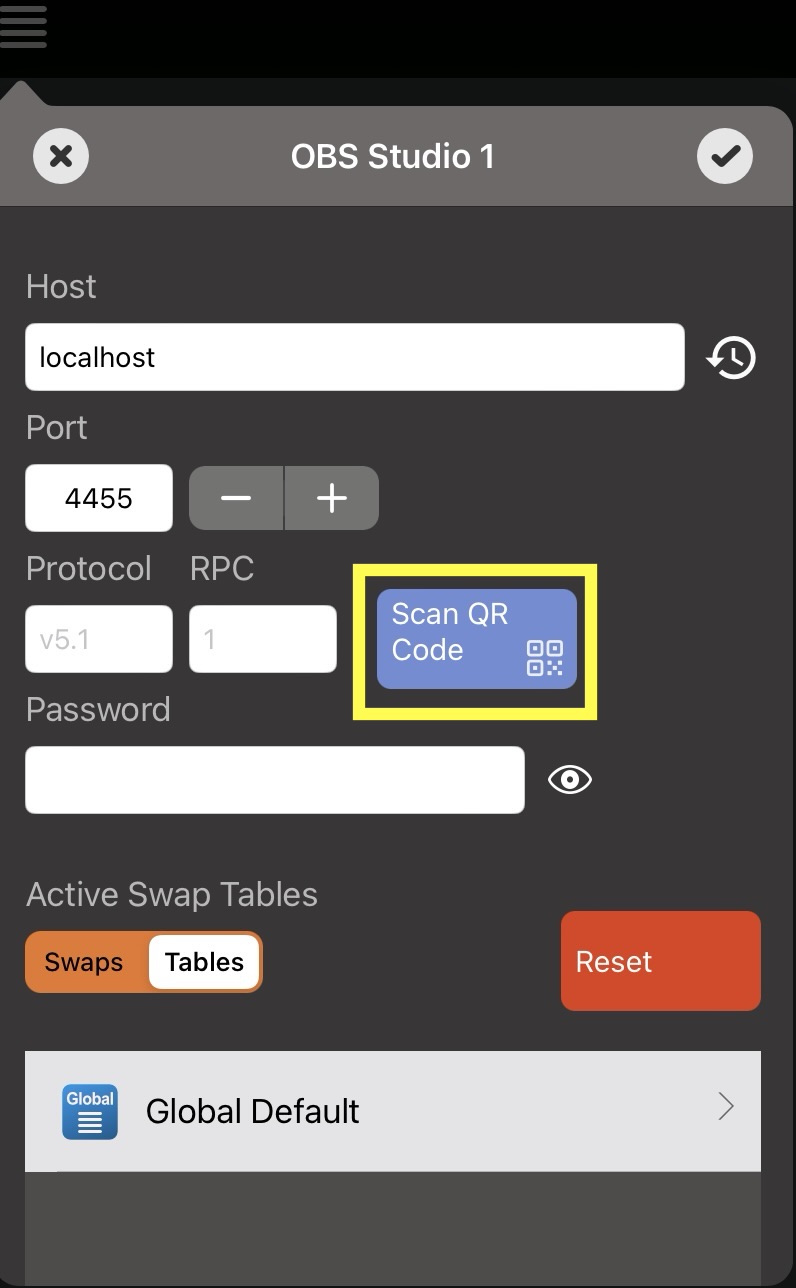
Scan QR Code fills in the host, port, and password from OBS.
Commands →
OBS Commands send JSON requests. DeviceJockey's general Template workflow is used here as a list of OBS Request Templates. A selected template prefills the request for a standard OBS function; it remains fully editable afterward.
Add OBS Value or OBS Range to the required Item action.
In the Command settings, select the Template button  above the JSON editor.
Search for the required OBS function and select it. DeviceJockey generates the JSON for you to adapt.
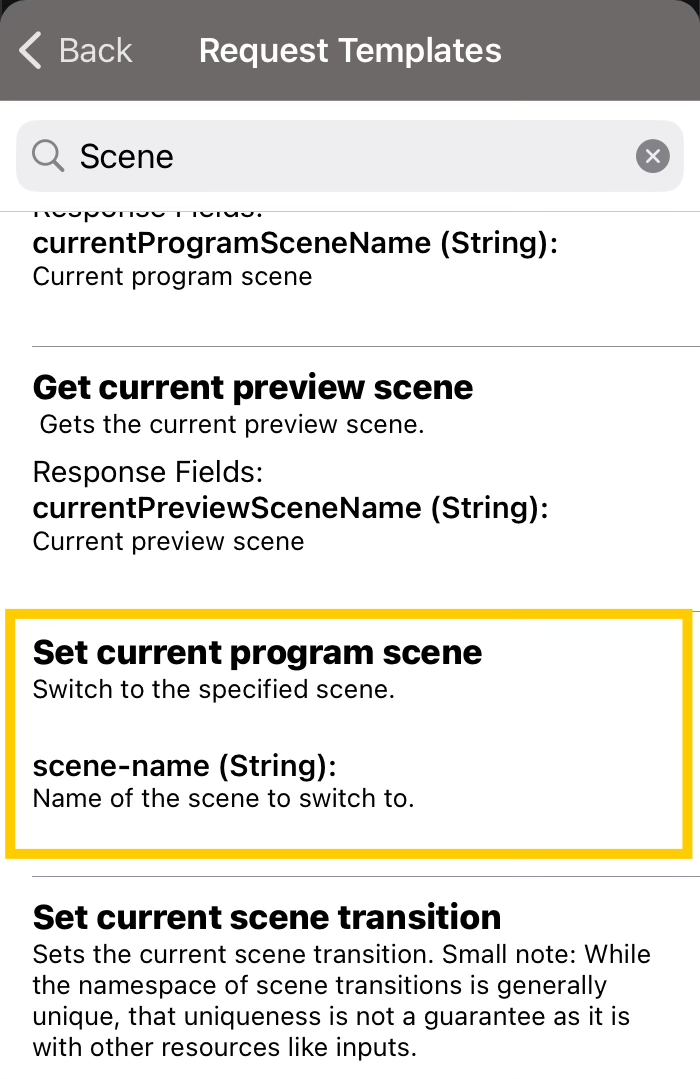
Search the template list and select the OBS function the Command should perform.
The following request was generated from Set Current Program Scene. Only the required scene name was changed to Main.
{
  "op": 6,
  "rpcVersion": 1,
  "d": {
    "requestType": "SetCurrentProgramScene",
    "requestId": "scene-main",
    "requestData": {
      "sceneName": "Main"
    }
  }
}Tells OBS what to do. In this example, SetCurrentProgramScene changes the program scene.
Contains the values needed by that request. Here, sceneName identifies the destination scene.
Uniquely identifies a request. Templates generate an ID automatically, but you can replace it with your own. OBS includes the same ID in its response, allowing an Event to recognize and react to that specific request.
Describe the OBS WebSocket message. The template supplies these values, so you normally do not need to edit them.
Send a configured JSON request. Use it when the request does not need a changing value from the Item.
Map the Item's current position between the configured Minimum and Maximum.
Dynamic Value Attribute: Enter the name of the value-holding JSON attribute, such as inputVolumeDb. When the Command is performed, DeviceJockey calculates the value and replaces the first matching attribute's value before sending the JSON. A suitable Request Template prefills the attribute name, value type, Minimum, and Maximum.
Remove all received messages from the OBS Event buffer. This is useful before producing the event you want to capture.
Request Scenes, Inputs, Outputs, Hotkeys, Transitions, or Collections from OBS. The user selects an entry and DeviceJockey stores its name in a Swap.
Edit the generated JSON and other Command settings as required. When you switch templates, DeviceJockey preserves compatible existing values such as input names, scene names, hotkeys, profiles, or volume settings when possible.
Command examples
← Events
DeviceJockey receives two useful kinds of JSON from OBS. An OBS Event is sent when something changes in OBS. An OBS Request Response is sent after DeviceJockey requests the current state. Both can be used by an Item Event.
For example, OBS sends CurrentProgramSceneChanged when its current program scene changes.
{
  "op": 5,
  "d": {
    "eventType": "CurrentProgramSceneChanged",
    "eventData": { "sceneName": "Main" }
  }
}For example, OBS returns the current scene after DeviceJockey sends GetCurrentProgramScene.
{
  "op": 7,
  "d": {
    "requestType": "GetCurrentProgramScene",
    "requestId": "current.scene.request",
    "responseData": { "currentProgramSceneName": "Main" }
  }
}
eventType identifies the change. eventData describes its new state, such as the active scene name.
requestType identifies the status request. responseData contains the state returned by OBS.
A Request Response repeats the ID of its request. Using a recognizable ID makes the response easy to identify in the Event buffer.
Determines which parts of an incoming message DeviceJockey checks before the Event can react. With op: 5, it checks eventType and eventData. With op: 7, it checks requestId and responseData. Keep op in the captured JSON so DeviceJockey applies the correct check.
Configured attributes and values must match. A different event type, input name, scene name, or request ID prevents the Event from reacting.
Attributes that exist only in the incoming OBS message are ignored. The Event can therefore still react when OBS includes information that is not relevant to it.
Its value is excluded from comparison. DeviceJockey reads the incoming value and applies it to the Item.
Its value is also excluded from comparison. DeviceJockey formats the incoming value and uses it as the Item label.
The Event reacts to the configured OBS Event or Request Response and performs the Item action.
Read the Dynamic Value Attribute, map it between Minimum and Maximum, and apply the result to a ranged Item.
When the Event reacts, read the Label Attribute from the incoming message and display its formatted value as the Item label.
React to the configured JSON by enabling or protecting supported Item interaction.
Display a selected value returned by GetStats, including CPU, memory, disk space, FPS, render time, frame counts, and WebSocket message counts.
OBS sends an Event or a Request Response to DeviceJockey.
The configured JSON acts as a filter. Every attribute and value kept in the Event must exist and match in the incoming message. Additional attributes are allowed, so unrelated information sent by OBS does not prevent the Event from reacting.
The Event performs the Item action or reads a dynamic value for its range or label.
Create an Event
The configured JSON acts as a filter. Every attribute and value kept in the Event must exist and match in the incoming message. Additional attributes are allowed, so unrelated information sent by OBS does not prevent the Event from reacting.
The Buffer stores the last 50 relevant OBS Events and Request Responses received by DeviceJockey. Use it to find the JSON produced by an action in OBS and transfer that JSON to the Event editor.
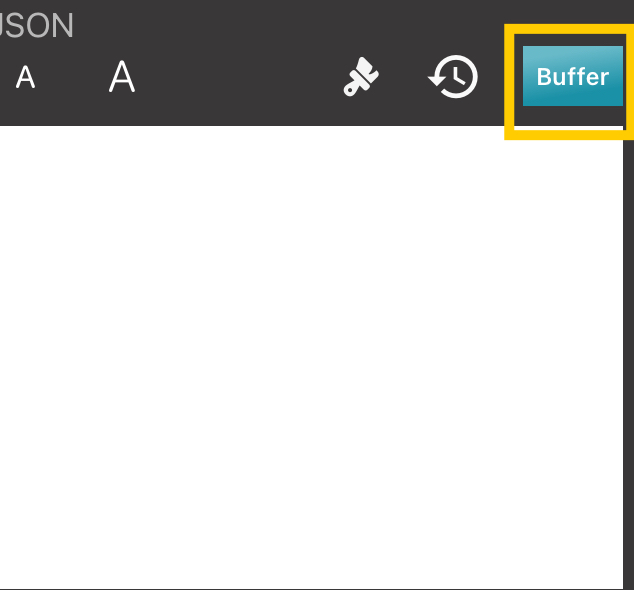
Activate Buffer in the JSON editor to inspect recently received OBS messages.
Tap Buffer. The JSON editor becomes gray and read-only. It now shows the currently selected Buffer entry.
Use the bin to clear old entries if needed. Perform the required action in OBS, then use minus and plus to find the corresponding OBS Event or Request Response.
While the required entry is visible, tap Buffer again. The editor becomes editable and keeps the selected JSON as the Event filter.
Minus and plus select an entry, the counter shows its position, and the bin clears the Buffer.
Successful responses without response data only confirm the request and are not useful as Item Events. Responses containing data and failed responses are retained.
Event examples
When an Event reacts to an OBS message, Remote Options can start one or more Item Commands.
Learn about Remote Options →Troubleshooting
Confirm that the WebSocket server is enabled in OBS Studio.
Compare the DeviceJockey settings with the address and port shown by OBS. The standard port is 4455.
Enter the current password again or scan a newly displayed OBS connection QR code.
Make sure both devices can reach each other and that a firewall is not blocking the WebSocket port.
Confirm that the expected message arrives and compare its identifying attributes with the configured Event JSON.
For Range or Label Events, verify the attribute name, value type, Minimum, and Maximum.