DeviceJockey Interfaces

Logic Pro Interface

Combine MIDI with Logic Pro’s control-surface OSC protocol to build a responsive custom controller.

Two control paths

Use MIDI directly or add the Logic Pro OSC surface.

DeviceJockey can control Logic Pro through standard MIDI and through the dedicated Logic Pro interface. The dedicated interface exchanges OSC messages with Logic Pro and requires the DeviceJockey MIDI Device Profile on the Mac.

MIDI

Use standard MIDI messages.

DeviceJockey ↔ Core MIDI ↔ Logic Pro

Add MIDI out and MIDI in interfaces and select the endpoints connected to the Mac.

Transport
Cable, virtual MIDI, or Bluetooth MIDI
Setup in Logic
Use Logic Pro’s MIDI and Controller Assignments
Open the MIDI guide →
Logic Pro OSC

Use the dedicated control surface.

DeviceJockey ↔ OSC ↔ Logic Pro

Install the profile, add a Logic Pro interface, and accept the control-surface connection in Logic.

Default port
8000
Required on Mac
DeviceJockey MIDI Device Profile
The MIDI Device Profile belongs to the OSC setup.

It defines DeviceJockey as a supported control surface and supplies the predefined OSC controls understood by Logic Pro.

Required download

Install the MIDI Device Profile on the Mac.

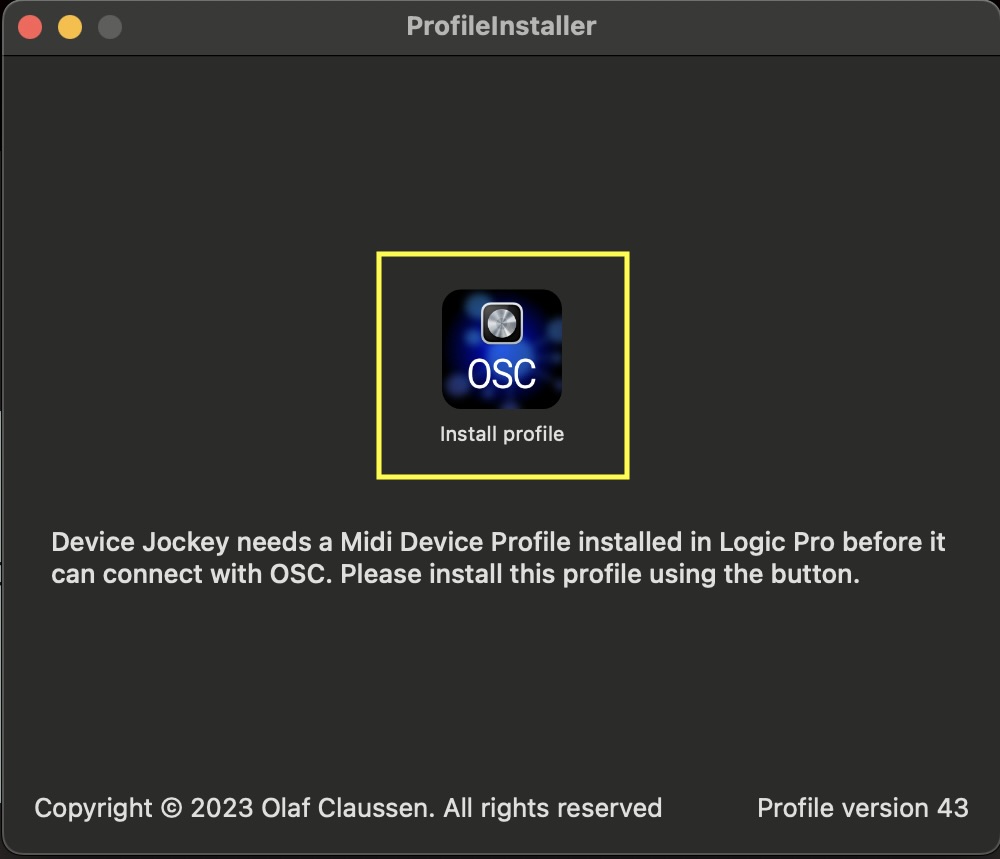
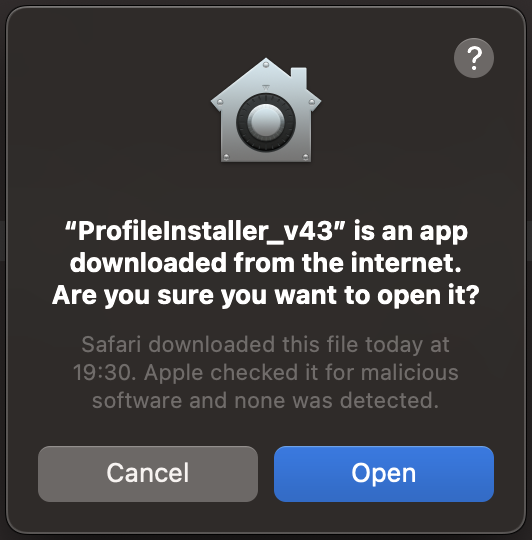
Download version 43 of the DeviceJockey Profile Installer, unzip it, and open the installer application on the Mac running Logic Pro. The installer application is signed and notarized for macOS.

Restart Logic Pro after installation.

Quit Logic Pro completely before installing again or when the new profile does not appear in the control-surface list.

DeviceJockey MIDI Device Profile Installer on macOS
Run the installer once, then quit and restart Logic Pro.

Verify the profile

Find DeviceJockey in Logic Pro.

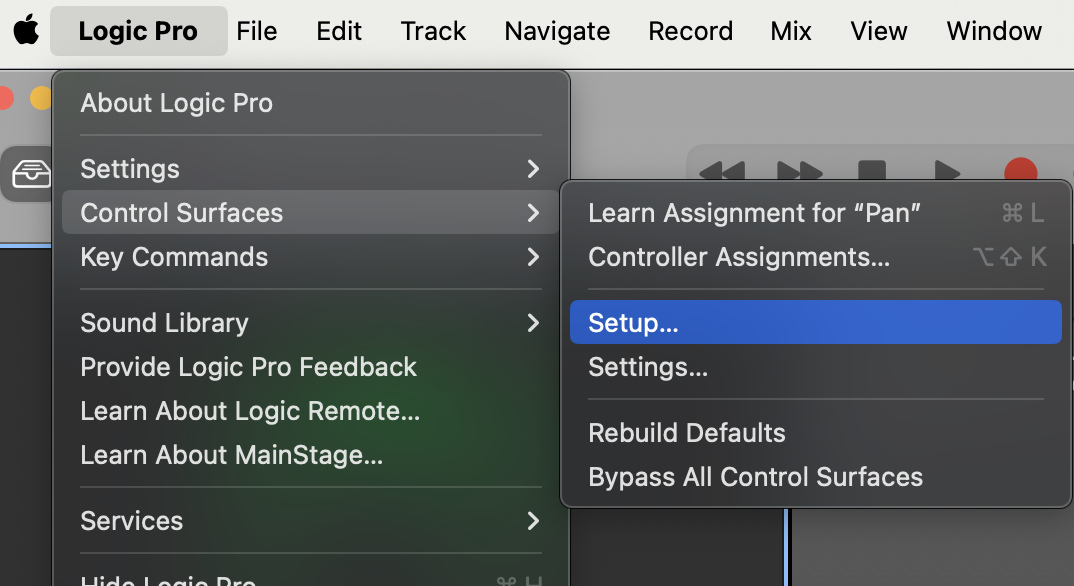
Open Control Surfaces.

In Logic Pro, open the Control Surfaces menu and choose Setup.

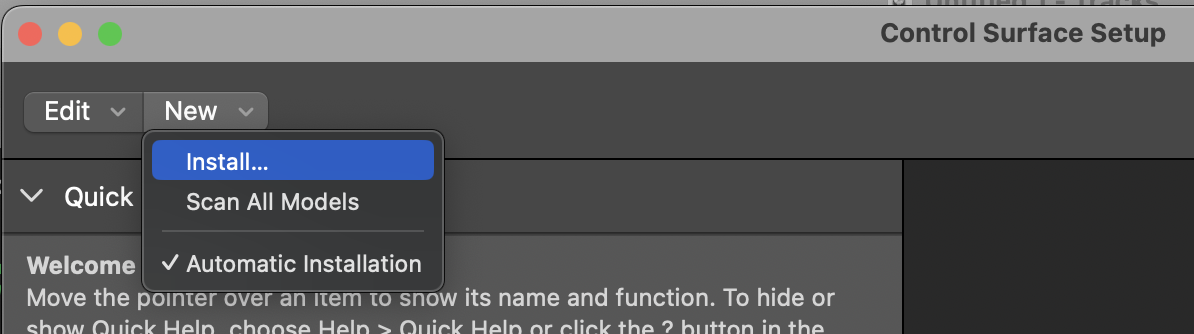
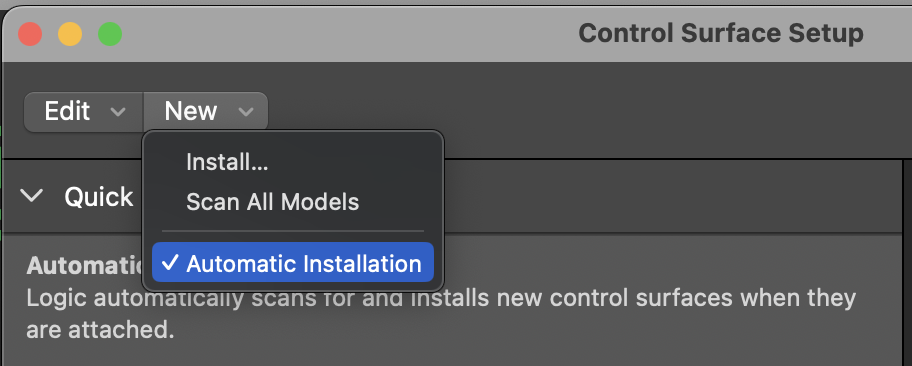
Open the installation list.

Choose New, then Install.

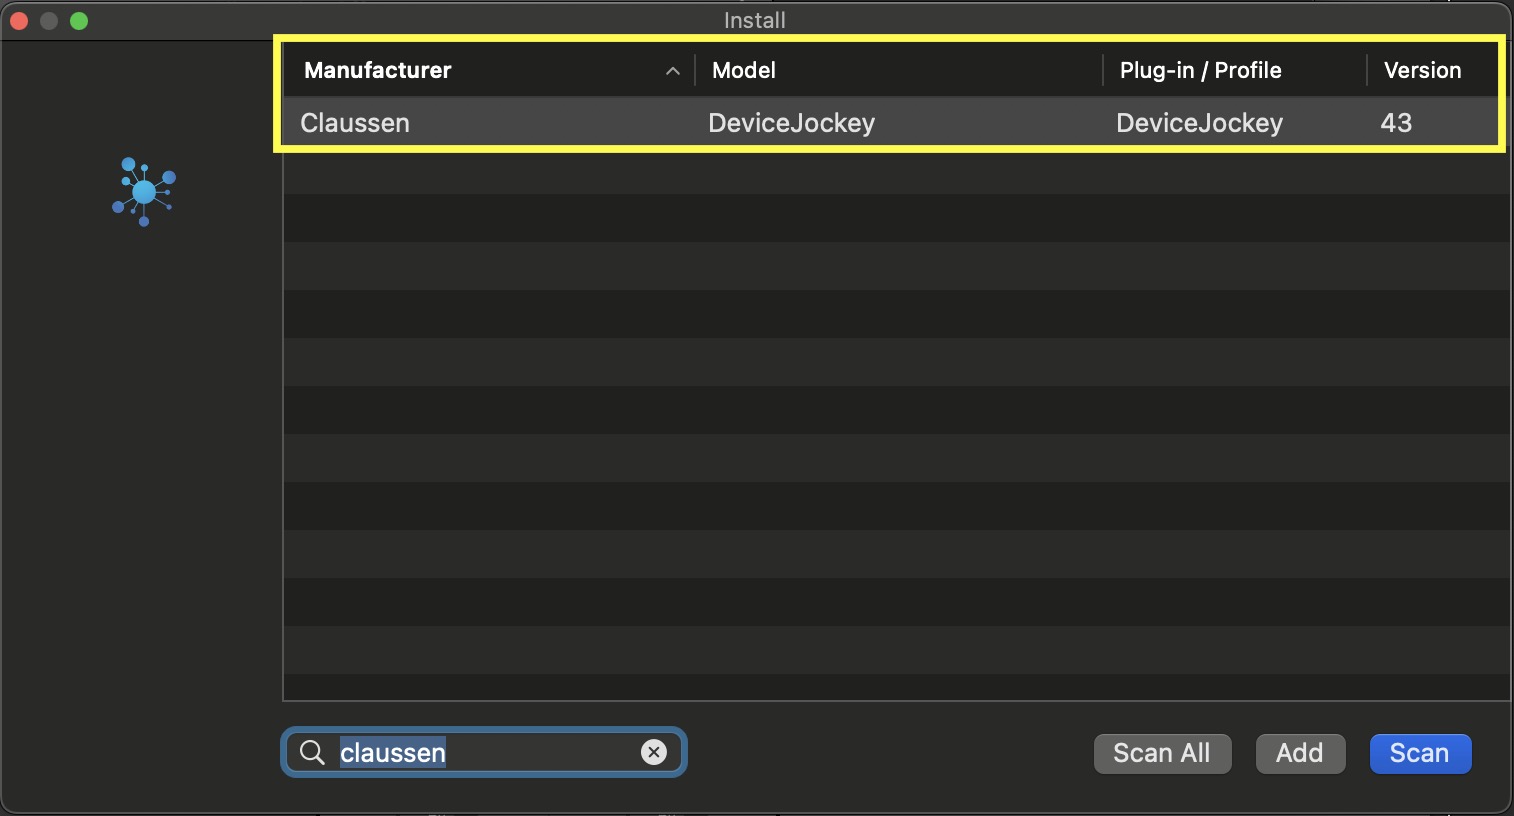
Search for the manufacturer.

Enter claussen in the search field.

Check the entry.

The list should show Claussen as manufacturer and DeviceJockey as model.

Enable automatic installation.

Keep Automatic installation enabled so Logic Pro can detect the DeviceJockey surface.

Logic Pro control surface installation list showing Claussen DeviceJockey
The installed profile appears as manufacturer Claussen and model DeviceJockey.

DeviceJockey setup

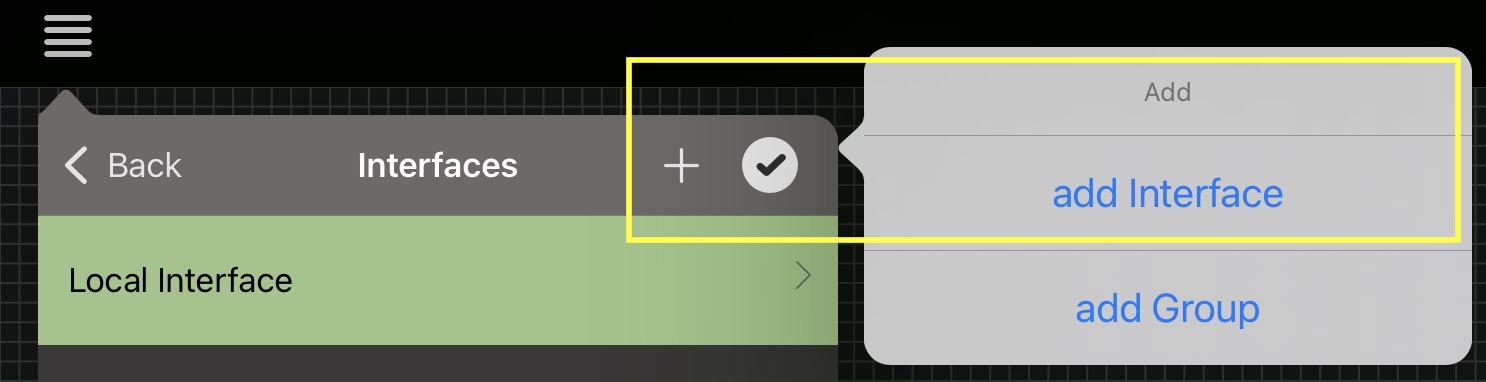
Add the Logic Pro interface.

1

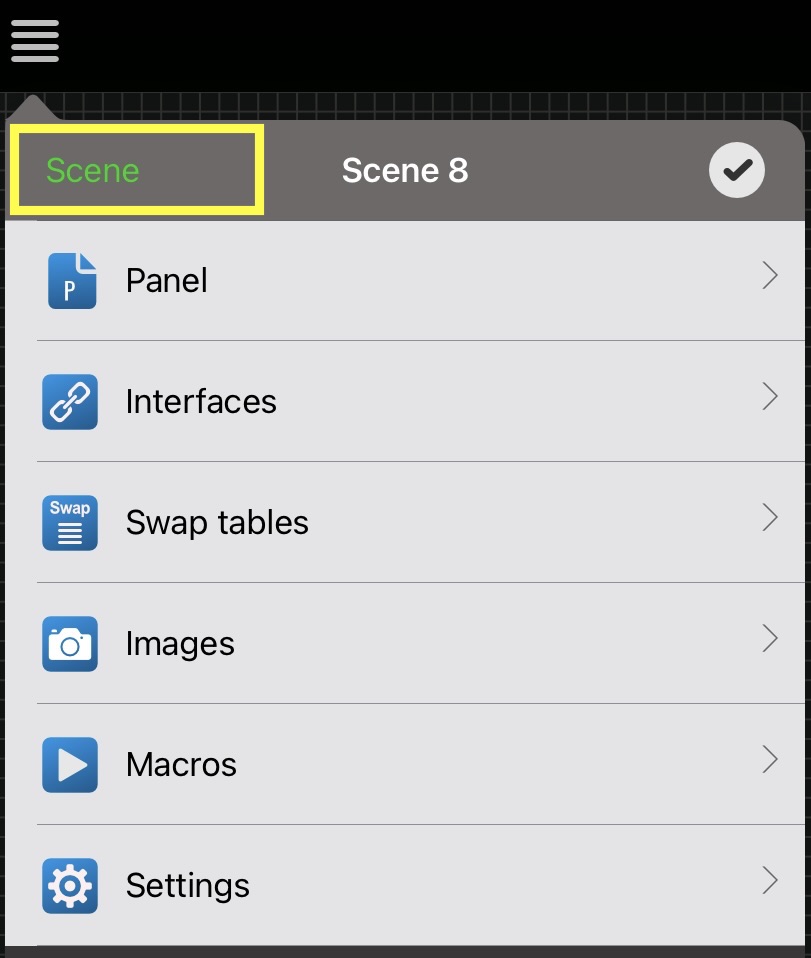
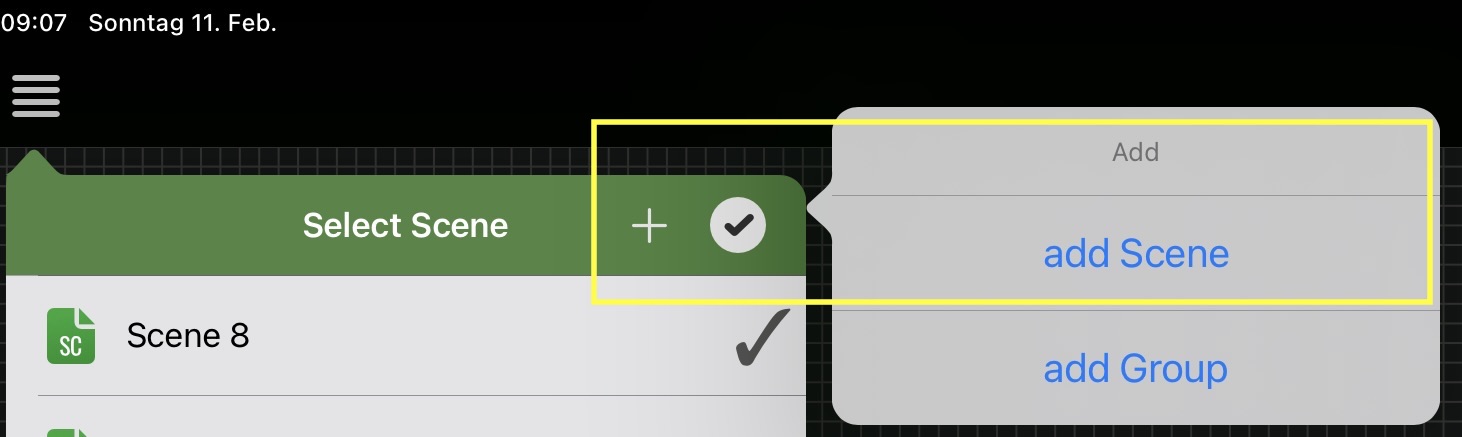
Create or select a scene

Use the scene that will contain your Logic Pro panels and controls.

2

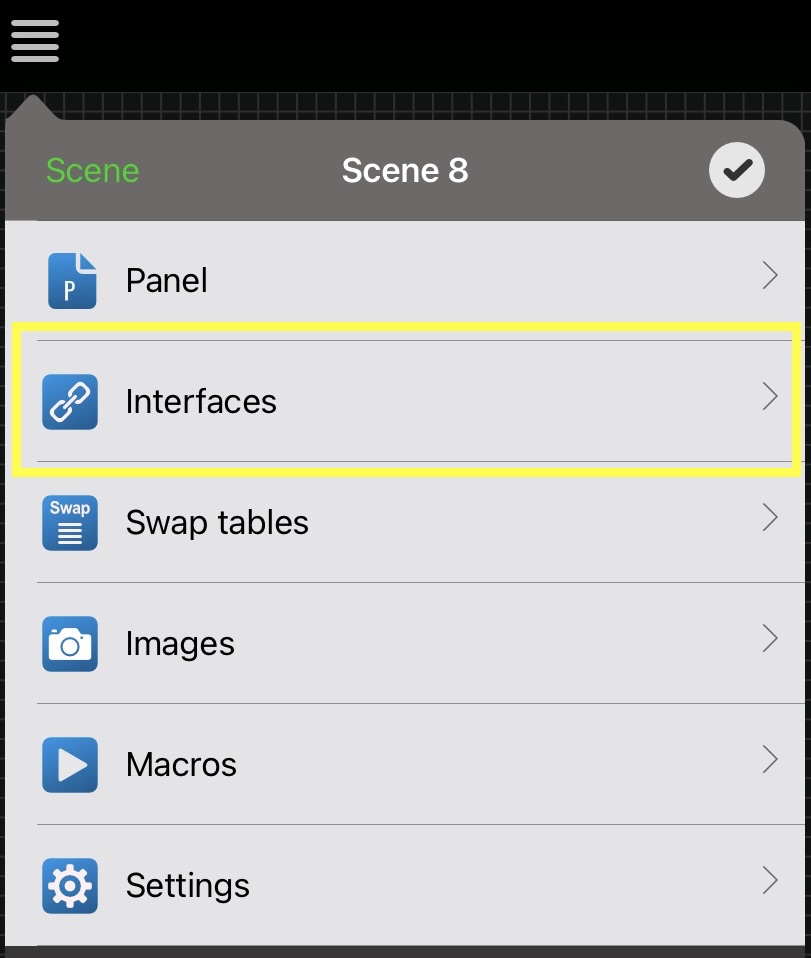
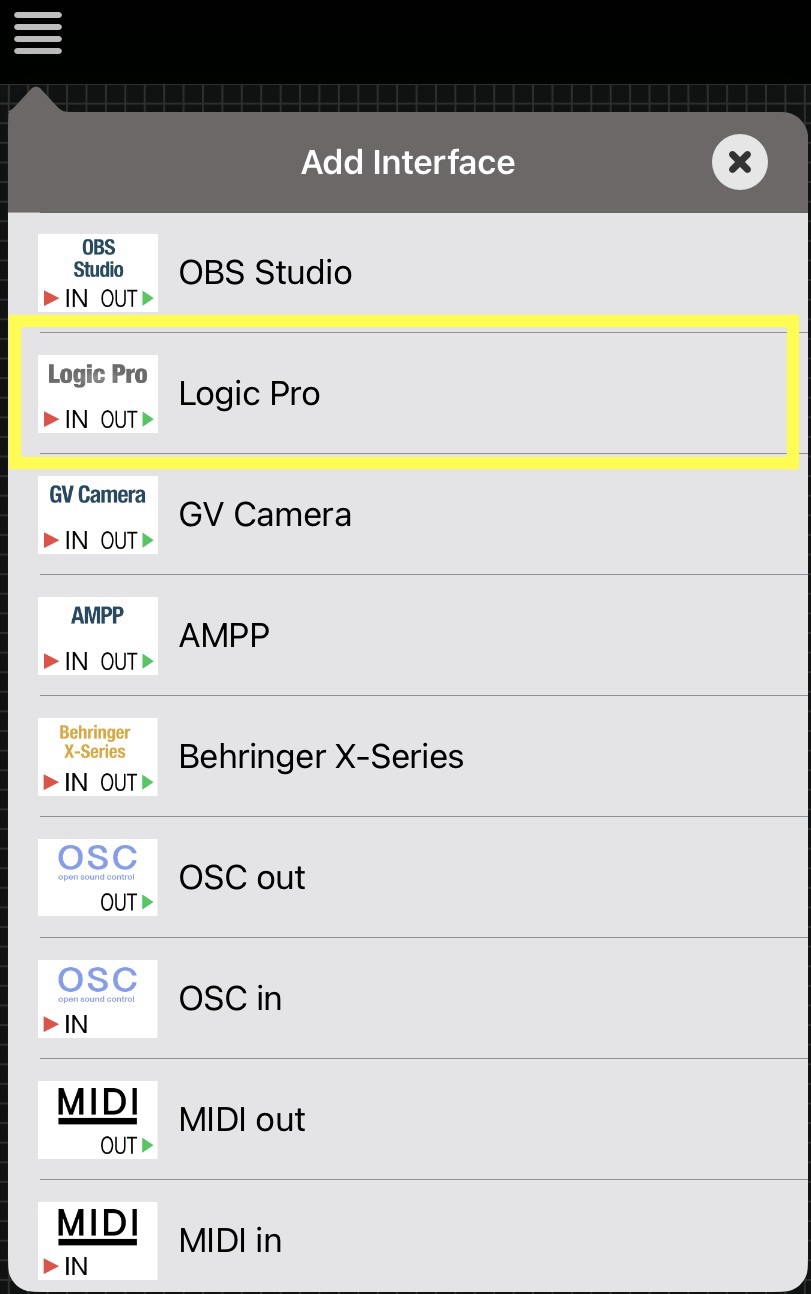
Add Logic Pro

Add a Logic Pro interface to the scene.

3

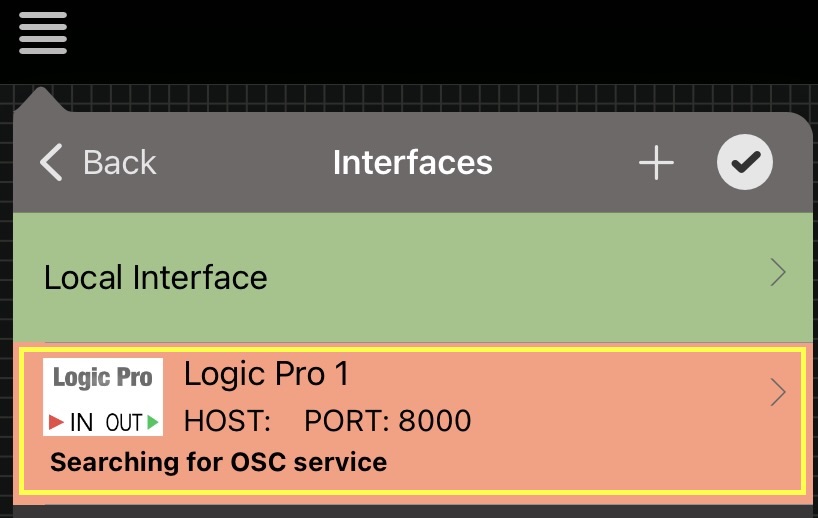
Check the port

Use port 8000 unless the installed profile and setup intentionally use another port.

4

Enable interfaces

Switch on interface connections. The Logic Pro interface begins waiting for Logic Pro.

No Logic Pro host address is entered manually.

The dedicated interface listens on its configured port and learns the Logic Pro connection when the control surface is established.

First connection

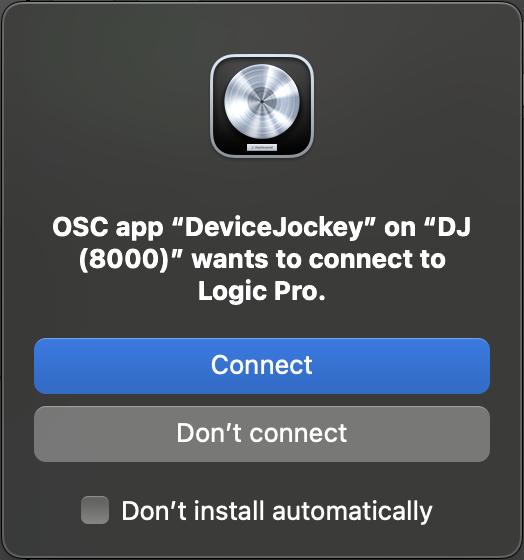
Accept the control surface in Logic Pro.

Logic Pro displays a connection request after it discovers DeviceJockey. Accept the request. DeviceJockey is then added to Control Surface Setup with its profile and OSC port.

Logic Pro request to connect to the DeviceJockey control surface
Accept the connection request so Logic Pro can add DeviceJockey as a control surface.
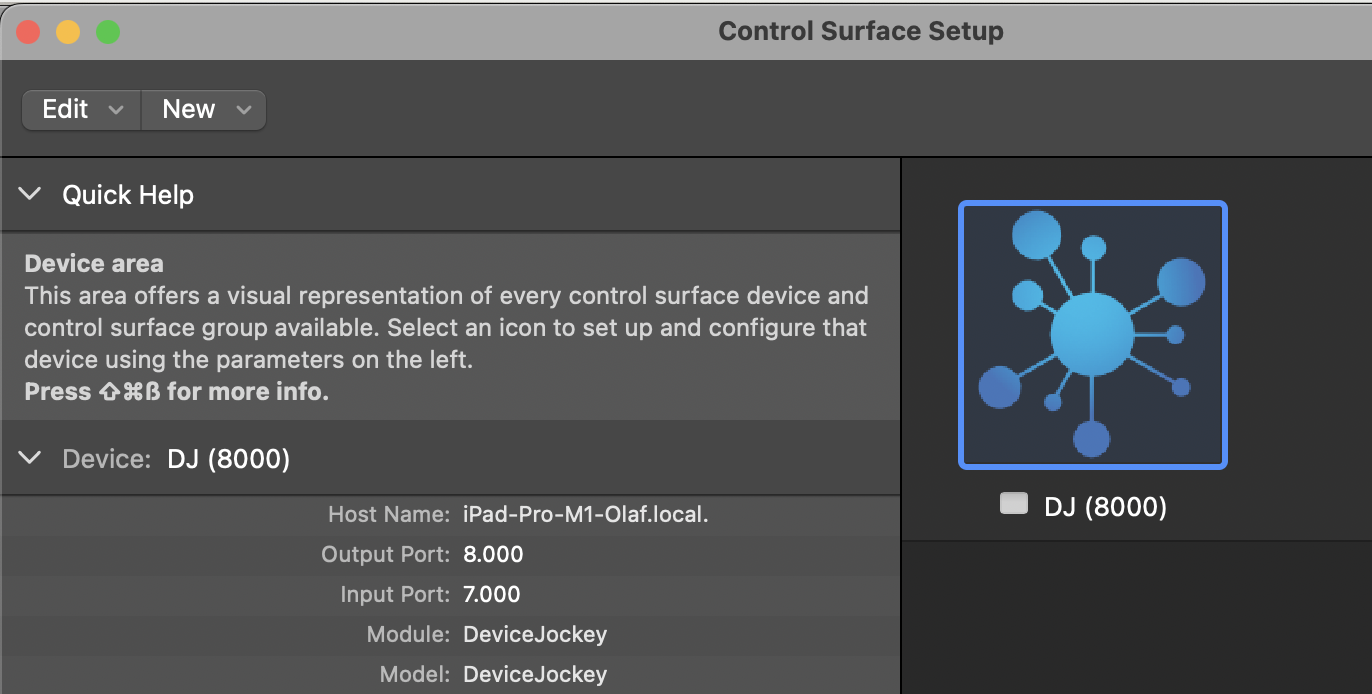
Check Control Surface Setup after connecting.

The DeviceJockey surface should appear with the DeviceJockey logo and the port used by the interface.

OSC controls

Use only paths defined by the profile.

Logic Pro’s control-surface OSC implementation does not accept arbitrary custom controls. Commands and events must use one of the OSC paths predefined by the installed DeviceJockey profile.

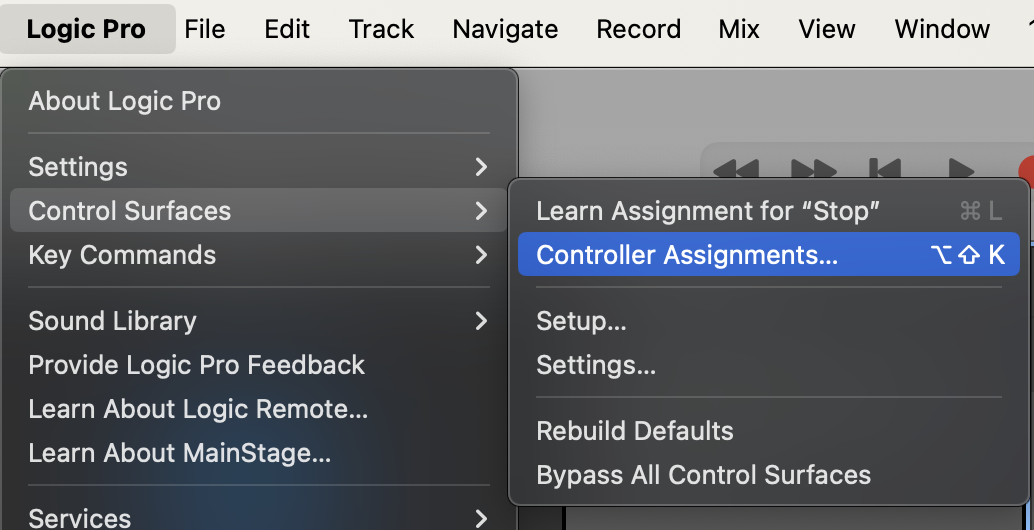
Open Controller Assignments.

Open the Logic Pro Controller Assignments window.

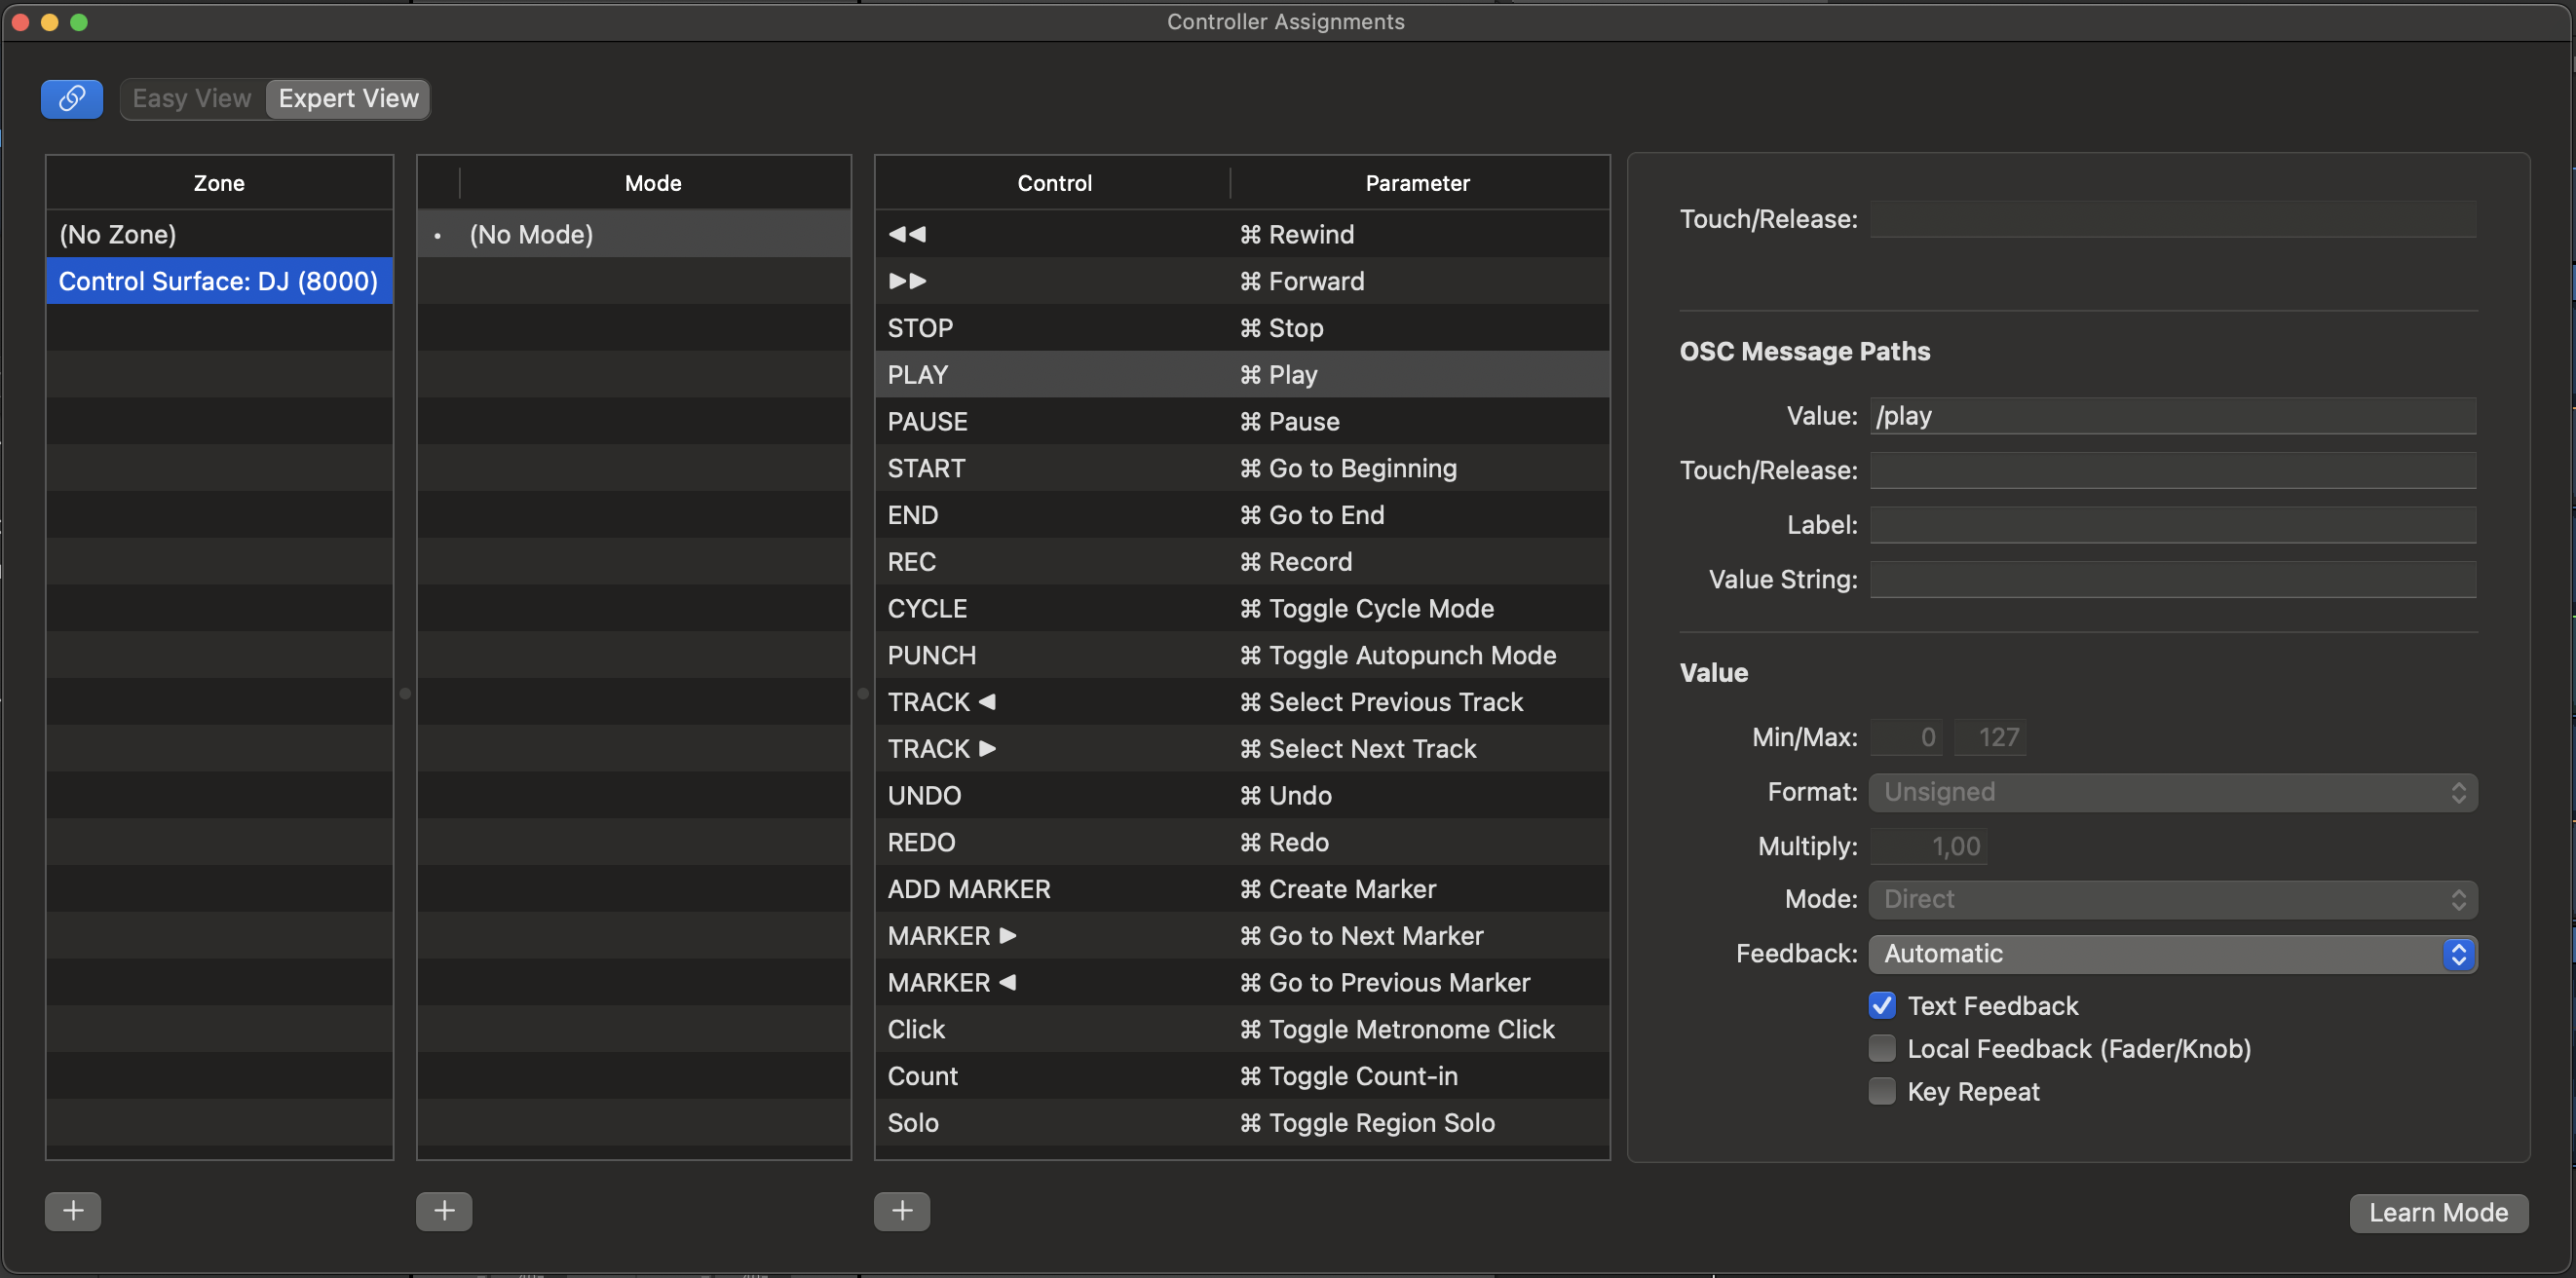
Select the DeviceJockey surface.

Choose the surface shown as DJ with its port, normally DJ (8000).

Select a control or parameter.

Choose the required entry from the Control or Parameter list.

Copy the OSC path.

Read the path from OSC Message Paths, Value, and use that exact path in DeviceJockey.

Logic Pro Controller Assignments showing predefined OSC Message Paths
Controller Assignments shows the OSC path defined for each supported control.

Commands

Send fixed or continuous OSC values.

Logic Pro Value

Send a fixed value or an OSC message without arguments to a predefined Logic Pro path.

Logic Pro Range

Map an item position between a configured minimum and maximum and send the result to a predefined Logic Pro path.

Both commands support Swaps in their configuration. Logic Pro Value can also use the item title as its sent value where that matches the selected profile control.

Events and feedback

Reflect Logic Pro state on the panel.

Logic Pro Value

React when a message on the configured OSC path contains the expected value.

Logic Pro Range

Map a received value into a slider, rotary control, light range, or another supported item property.

Logic Pro Label

Display the value received on a selected Logic Pro OSC path as an item label.

Logic Pro Color

Apply the color value reported by Logic Pro to a supported item.

Logic Pro Increment

Interpret step-up and step-down values as relative item movement.

Logic Pro Enable and Disable

Allow or protect supported item interaction based on Logic Pro feedback.

Logic Pro Save state

Save a named item state when the configured OSC message is received.

Logic Pro Load state

Recall a named item state, optionally with supported animation settings.

The interface buffers current path values.

Supported events can use buffered Logic Pro messages during a status check so the panel can restore the latest received state.

Example scene

Start with the Logic Pro Toolbox.

The toolbox scene contains predefined OSC controls from the DeviceJockey profile. Import it into DeviceJockey, test the controls, and copy suitable items into your own scene and panels.

Copy a known working control.

Starting from a toolbox item preserves its predefined command and feedback paths and reduces typing errors.

Logic Pro Toolbox

The Toolbox is a starting point, not a required layout.

Import the scene, identify the controls useful for your workflow, and copy those items into panels designed for your own tasks.

Troubleshooting

If Logic Pro does not connect or respond.

Verify the profile.

In Control Surfaces, Setup, New, Install, search for Claussen and confirm that DeviceJockey appears.

Restart Logic Pro.

Quit it completely after profile installation or reinstallation.

Enable Automatic installation.

Logic Pro must be allowed to detect and add the DeviceJockey surface.

Check port 8000.

The interface port and the port associated with the Logic Pro surface must match.

Accept the connection request.

Logic Pro cannot complete the first connection until the control-surface request is accepted.

Check the OSC path.

Copy a predefined path from Controller Assignments. Logic Pro ignores arbitrary paths not included in the profile.

Check the Mac firewall and network.

The Mac and iPhone or iPad must be able to exchange UDP traffic on the configured port.

Separate MIDI from OSC.

When troubleshooting, confirm whether the affected item uses MIDI in or out, or the dedicated Logic Pro interface.