DeviceJockey Guide

Game Controller

Control buttons, sliders, and rotary items with the physical controls of a connected game controller.

How it works

Controller input becomes a Local Interface event.

DeviceJockey translates supported controller functions into Local Interface paths. An item event listens to the selected path and maps the received value to a light, slider, rotary control, label, or another supported item property.

Physical input

Use a button, trigger, D-Pad, or thumbstick.

Controller → DeviceJockey

The controller manager converts each supported action into a named function and value.

Examples
Button press, axis position, rotation step, or drive speed
Transport
Apple Game Controller framework
Item reaction

Map that value with an event.

Local event → Item

The selected controller function provides a Local path and suitable default values.

Interface
Local Interface
Examples
Range, Increment, Drive, and Label events
No separate Game Controller interface is required.

Controller functions are selected inside events from the Local Interface.

Connect the controller

Pair it with the iPhone or iPad first.

1

Enable pairing mode

Use the controller’s pairing procedure so the Apple device can discover it.

2

Open Bluetooth settings

Select the controller in the Bluetooth settings of the iPhone or iPad.

3

Check DeviceJockey

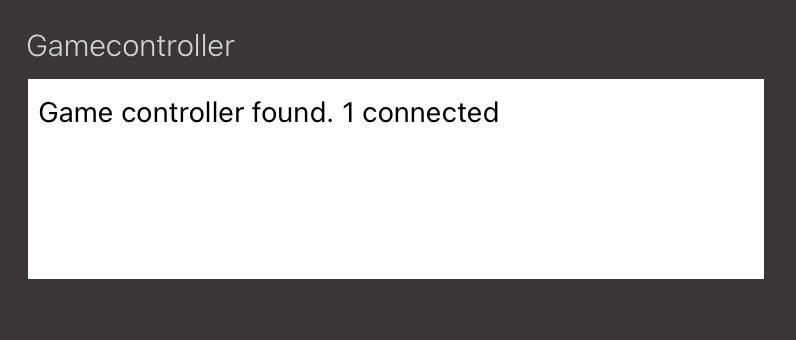
Open Settings, then Developer Extras, and confirm that a controller was found.

4

Test a control

Press a button or move a thumbstick. The most recently detected function appears in the controller field.

Game controller found message in DeviceJockey Developer Extras
Developer Extras shows whether DeviceJockey has detected the controller and displays the last used control.

Item setup

Select a controller function in a Local event.

Add a suitable item event.

For example, add Range to a button light or slider, Increment to a slider or rotary item, or Drive to a slider.

Select the Local Interface.

Game controller input is provided through the Local Interface.

Open the controller function list.

Select the game controller icon beside the Path field.

Operate the physical control.

Press a button or move a thumbstick to filter the list to related functions.

Select the required function.

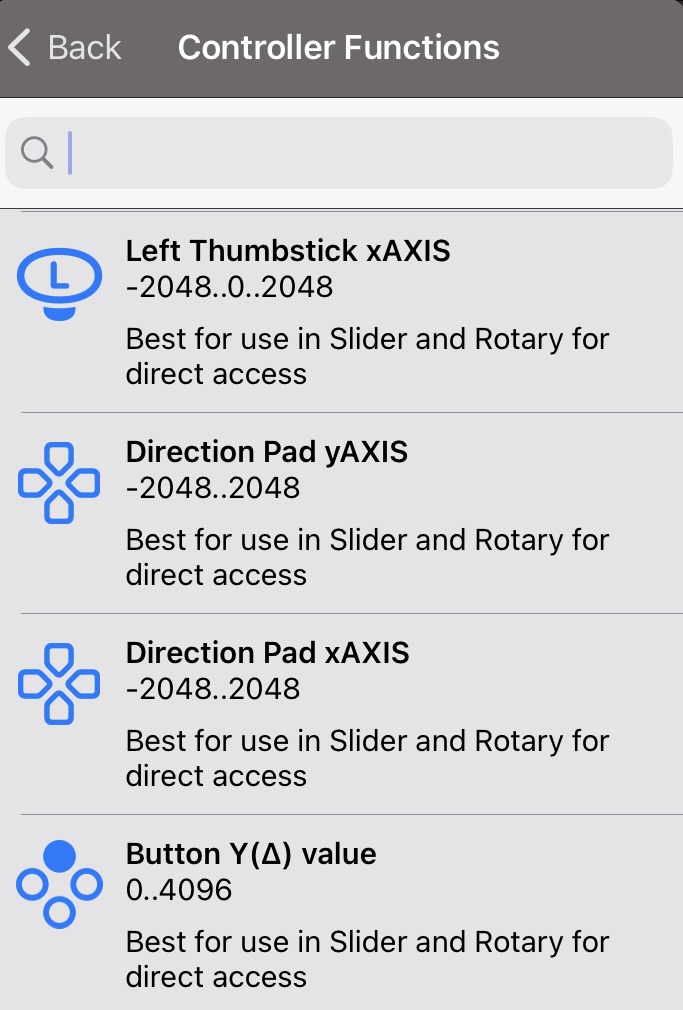
DeviceJockey fills the path, value type, and suitable default values for that function.

DeviceJockey list of controller functions with value ranges and recommended uses
The function list shows its value range and the event type for which it is intended.
Use the controller as a physical filter.

Move the right thumbstick while the list is open to show the functions associated with that thumbstick.

Function families

Choose the behavior that matches the item.

Pressed

Returns 1 while a button or D-Pad direction is pressed and 0 when released. It is suited to taps, toggles, and item lights.

Long pressed

Provides a separate function for holding a button, shoulder control, trigger, or D-Pad direction.

Direct axis

Maps a thumbstick or D-Pad axis from -2048 through 0 to 2048 for direct slider or rotary control.

Analog value

Reads the continuous value of supported buttons, shoulder controls, and triggers from 0 to 4096.

Increment

Turns a circular thumbstick movement into relative steps of -1 and 1 for an Increment event.

Drive

Uses a centered thumbstick value from -100 through 0 to 100 as direction and speed for a Drive event.

Trigger Drive

Uses a trigger value from 0 to 100 as a one-directional drive speed.

Controller status

Provides connection state, vendor name, battery level, and battery state through Local paths.

Example 1

Light a button while a controller button is pressed.

Create a button.

Add a Range event to its Light on and off action and select the Local Interface.

Select a Pressed function.

Press the physical button to filter the list, then choose its Button pressed function.

Use the default range.

Light on responds to 1. Light off responds to 0. The value type is Int32.

Enter Live Mode.

The item lights while the controller button is held and turns off when it is released.

Example 2

Control a slider directly with a thumbstick.

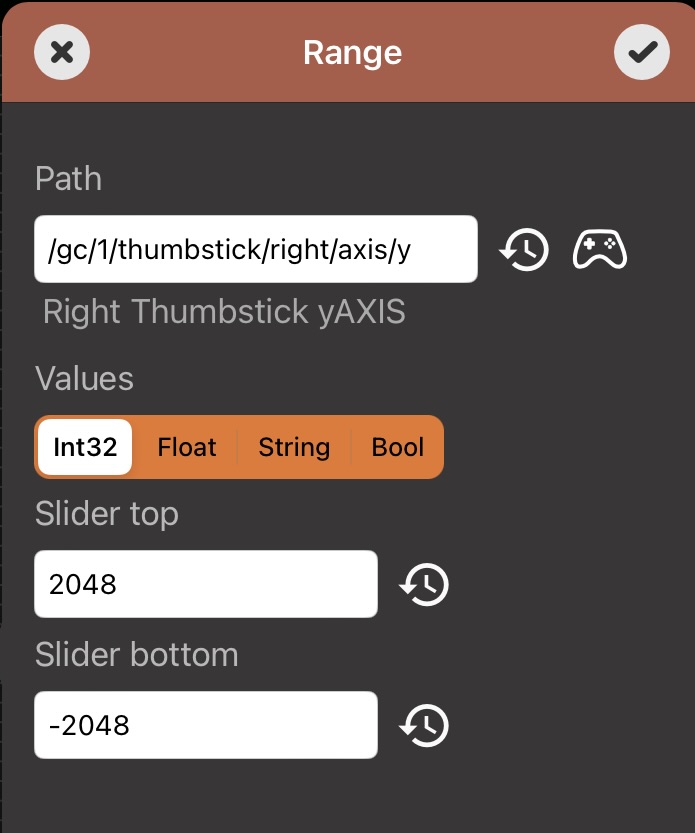
Add a Range event to the slider action and select a thumbstick axis such as Right Thumbstick yAXIS. The selected function provides the direct range from -2048 at one end to 2048 at the other end.

Range event configured for direct slider control with the right thumbstick Y axis
The Range event maps the full thumbstick axis directly to the slider.
Direct control follows the physical position.

When the thumbstick returns to its center, a directly controlled slider also returns to the mapped center position.

Example 3

Use a thumbstick like an incremental encoder.

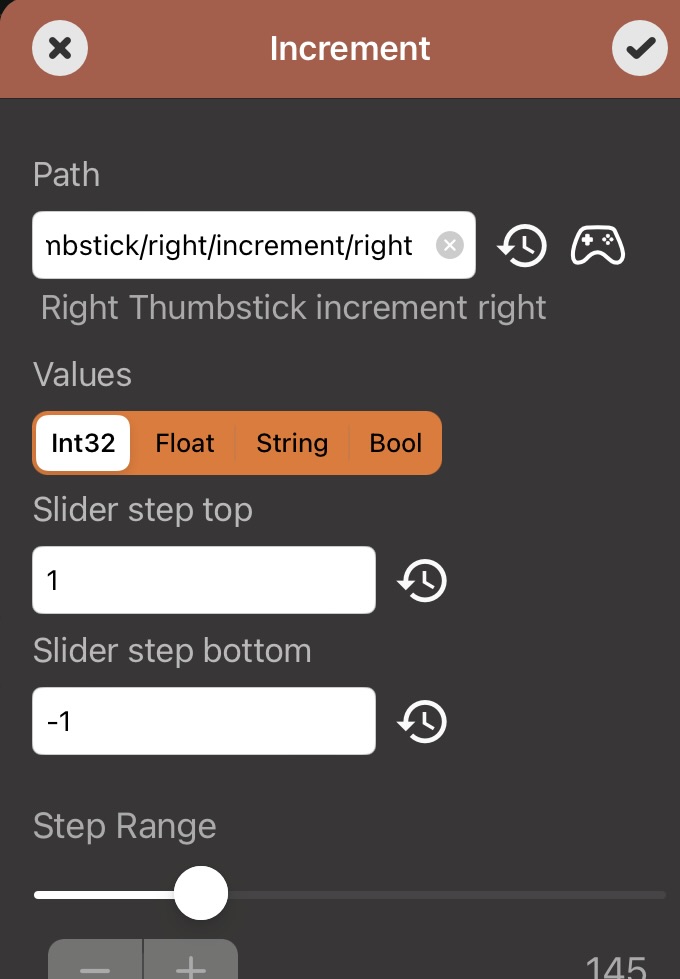
Add an Increment event to a slider or rotary item. Select one of the thumbstick Increment functions. Push the stick fully in the named direction to activate it, then rotate around the outside. Clockwise and counterclockwise movement produces relative steps.

Increment event configured for right thumbstick rotation
The Increment event uses -1 and 1 to move the item down or up one step.
Use Increment when the item should keep its value.

Unlike direct axis control, returning the thumbstick to its center does not return the slider to the center.

Example 4

Move a slider with direction and speed.

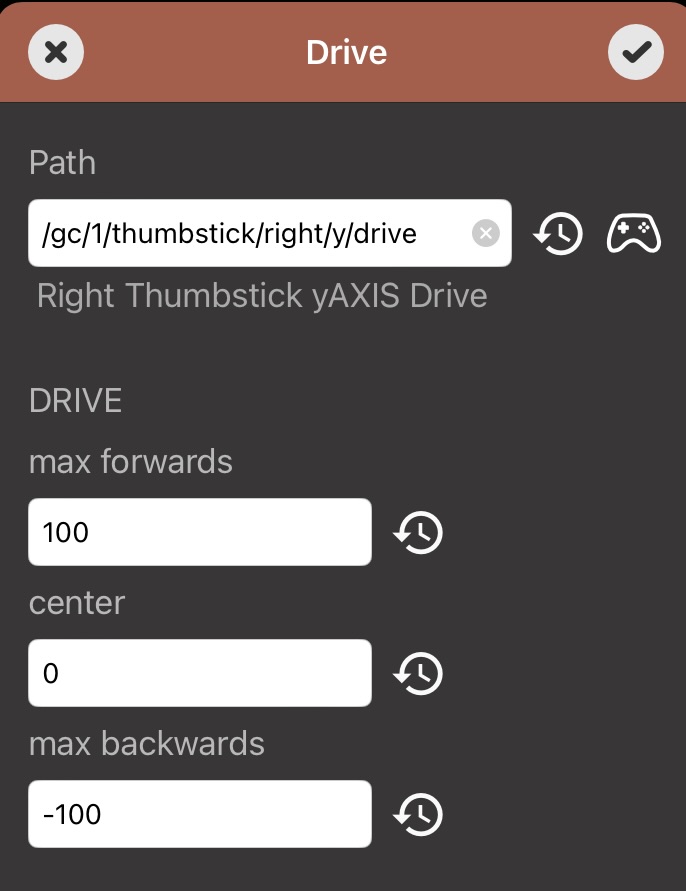
Add a Drive event to the slider action and select a thumbstick Drive function. The center value 0 stops the slider. Values toward 100 move it in one direction. Values toward -100 move it in the other direction. A larger distance from the center produces faster movement.

Drive event configured for right thumbstick Y axis direction and speed
The Drive event uses maximum forward, center, and maximum backward values.
Drive controls movement, not position.

Release the thumbstick to stop. The slider remains at the position it has reached.

Controller status

Show connection and battery information.

Status functions can be selected like other controller functions and used with a matching Local event.

Controller connected

Returns 1 when a controller is available and 0 when no controller is connected.

Vendor name

Returns the controller name reported by the system.

Battery power

Returns the current controller battery level when the information is available.

Battery state

Reports states such as discharging, charging, or full when supported by the controller.

Troubleshooting

If controller input does not reach an item.

Check the Apple connection.

Confirm that the controller appears as connected in the Bluetooth or Game Controller settings of the device.

Check Developer Extras.

Verify that DeviceJockey reports a connected controller and recognizes the physical control you operate.

Verify the Local Interface.

The item event must use the Local Interface and the selected /gc/1/ path.

Compare the event type.

Use Range for direct values, Increment for relative steps, and Drive for direction and speed.

Enter Live Mode.

Controller actions are intended to control the active panel in Live Mode.

Check controller support.

Available buttons, battery information, and other features depend on the connected controller.